Trials and tales of an amateur cake “Expert”. Things you can’t learn about making cakes from watching TV or reading books
This will be a series of posts all relating to making CAKE
Scratch or Box?
Show Cake: A show cake can be anything from a cake you make for a contest to a cake that you know no one will eat much of. Here the priority is what the cake looks like, not what it tastes like.

 Thats it. There are no other choices, so let’s break that down. In order for a cake to be large enough to serve over 150 people it needs to have a structure. That structure can be anything from a wooden form to metal bracing. The simplest structure to hold a multi tiered cake is simple wooden or plastic dowels that are pushed through the cake to support the layer above it. Or you can watch one of the TV shows and see the elaborate frames they use to support their “show” cake. Ahh, now we are getting to the point I want to make. While you are watching those TV shows, notice that the cake they use is extremely dense. When I say dense, I mean that they can stand on the cake. Also notice that these very same cakes are made in a shallow sheet pan and then cut out with a cookie cutter type of device, to the shape needed. The reason the cake is thin is to make it firm and strong. You CAN NOT make a cake that tastes good that way. At least I haven’t figured out how.So ask yourself, how can they stack cake 3 feet tall without the sides sagging or even crumbling and have the cake not taste like cardboard? They CAN’T! Period. So you have to make the choice I posed above. If you would like your cake to look impressive and taste good then you must be very creative in your cake design. Plus, all conditions must be perfect, which they NEVER are. Remember that a good tasting cake is moist, soft and never dry.Our method: We design the cake to any shape and specs that the bride and groom want, but we try to find a way to achieve that look and still deliver a cake that will be completely eaten by their guests. We do it by making box cakes. Yes, box cakes. Go to the store and buy what ever flavor box cake your customer wants and then make it in your kitchen. We have tried lots of different scratch recipes, but none of them taste as good or are as moist as a box cake. We still put the wet ingredients in, so really all you are buying is the flour, baking powder, sugar and coloring. You still add the water or milk, oil or butter and the whole eggs or egg whites. You still mix it, you still pour it in the pan of your choice and you still cook the thing until it is done. Which, by the way, never is what the back of the box says.Tricks of the trade: There are tricks you can use to improve the work-ability of your cake with out hurting the taste. In fact, these tricks often improve the taste.1) Cook in 2″ thick cake pans, greased, floured and the bottom lined with parchment paper, filled 3/4 full of batter, allowing the cake to rise above the pan in order to be leveled. Cook the cake until the side of the cake separates from the pan about an 1/8th of an inch, no mater if you are cooking a 16″ square cake or a 4″ round. If you do that, your center will be done and will be firmer.2) Always let your cake cool in the pan on a rack until you can easily handle it without gloves. The longer the cake sits out the firmer the crumbs will become. But if you wait too long the cake will stick to the pan and you will have to warm the bottom to get it to release.
3) after turning the cake out on to a elevated drying rack you can let it sit for up to 12 hours. In fact you should let it sit for at least 8 hours. The texture of the cake will improve and you will be able to handle the cake more easily. Chocolate cake is the easiest to work with because it has lots of fat and whole eggs to bind it together. White cake and Red Velvet are the hardest cakes to work with, because they are so soft. We call this stage the staling stage. The cake doesn’t really get stale, but it becomes more of a unit. After the staling stage, place the cake on at least a 1/4′ foam board and level the top with either a knife or a cake saw and then wrap it in plastic wrap and put it in the freezer. Freeze each layer over night or for at least 4 hours. Amazingly, freezing vastly improves the texture of the cake. We then remove the cake from the freezer and bring it to almost room temperature before using a cake saw to cut it in half. Ice with what ever you want between the layers and continue to build the cake.
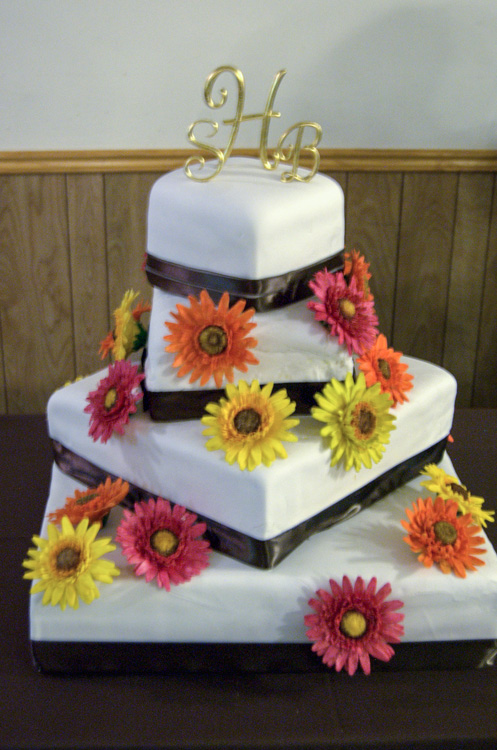
Our cakes, soft and moist, are almost always eaten completely. The cake in the picture below is one of our wedding cakes. It is 4 – 4″ layers of white cake with white buttercream icing covered in white fondant. We used 48 cake mixes, 72 pounds of confectioners sugar, 2 gals of Crisco, a pint of vanilla and 12 dozen egg whites. Problematic conditions were overcome. The bride was happy that the cake was almost completely eaten by the more than 300 guests.