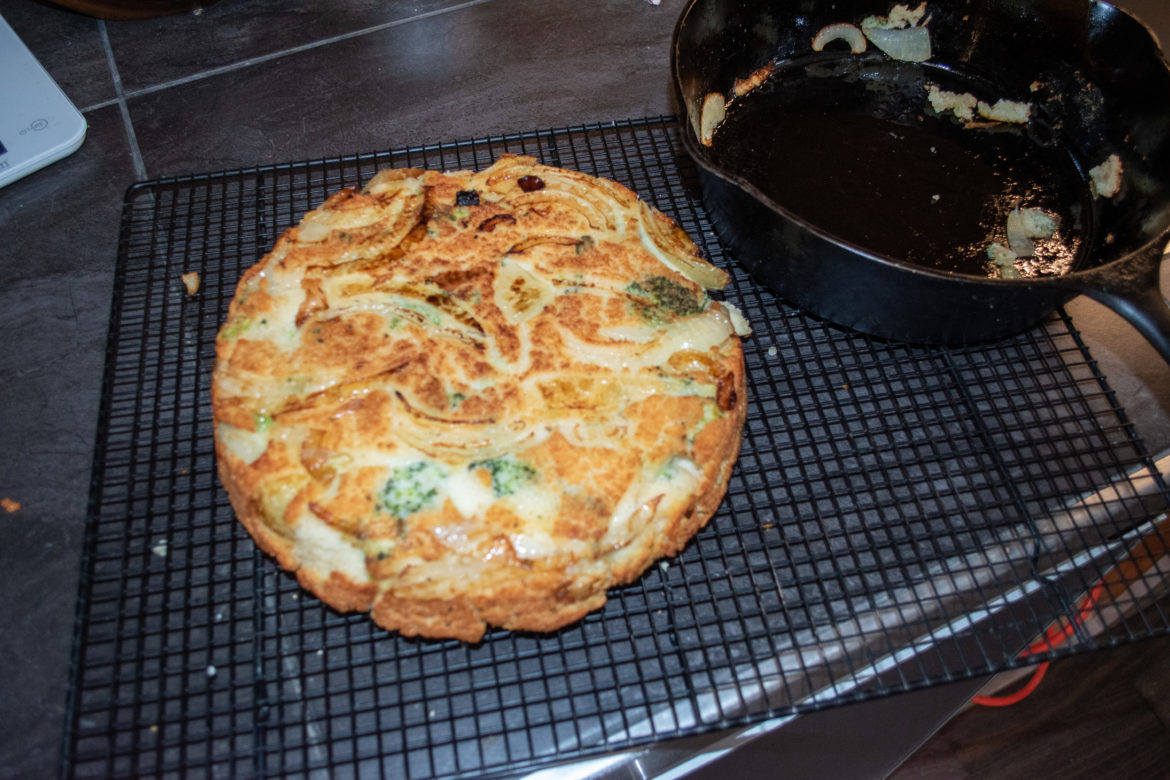
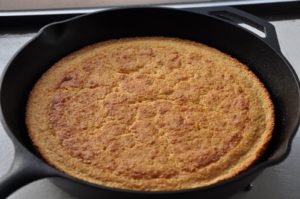
This Southern Onion and Broccoli Cornbread recipe is based on a recipe that Pat Gallman Winstead, posted originally by Sweetsavant.com on FB recently.
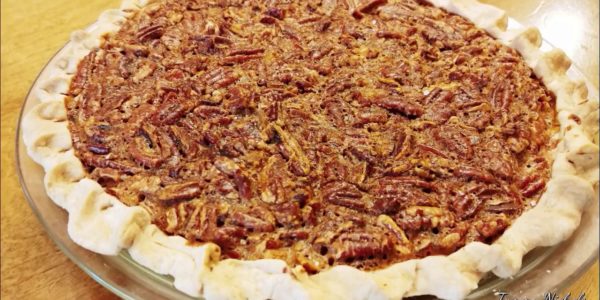
In fact I’m using their picture until I can photograph my version of the recipe.
Their title got my attention. Vidalia Onion Upside Down Broccoli Cornbread. I thought that it must be a Southern recipe because it has Vidalia onions in the title. Then I read the tell tale ingredient, “Sugar”.
I wasn’t born in the South but I’ve lived in the Atlanta GA area for 58 years as of the date of this post. I consider myself a Southerner at least in the heart. Being a Southern boy I know that cornbread made with sugar is not Southern Cornbread. Period.
Sweet corn in the south is just that, sweet. It follows that if you use a southern made flour and cornmeal your cornbread will be sweet enough.
Therefore since I like the idea of the yankee recipe I decided to use my Sister-In-Law, Beverly’s cornbread recipe and do a onion broccoli variation. Let me know if you like it. – jughandle
Bread

Beverly's Southern Upside Down Onion Broccoli Cornbread Recipe

Ingredients
What You Will Need:
- 1/4 Cup Crisco shortening
- 3 Cups Self-rising CornMeal Martha White "Hot rise"
- 1/2 Cup Self-rising Flour White lily brand only
- 1 Cup Buttermilk
- 2 Eggs large eggs
- 1 large Vidalia Onion Or other sweet onion cut into rings
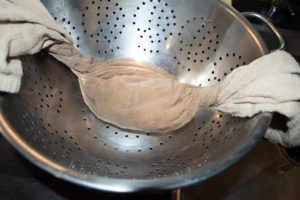
- 1 Cup Broccoli Chopped. If using frozen, defrost and wring the extra water out in a towel.
Instructions
Method:
- Preheat oven to 425-450F.
- Heavily coat a cold 9-inch cast iron skillet with 1/4 cup of Crisco shortening – coat heavily because the batter kind of fries in the shortening
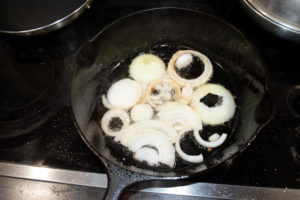
- Put greased skillet into hot oven and remove when shortening is melted
- add the onion rings to the bottom of the skillet and arrange evenly. Return to the oven and let cook while you mix the batter.
For The Batter
- Add cornmeal and flour together in a large bowl.
- Mix the eggs and buttermilk in a separate bowl
- Add the liquid mixture to the dry ingredients to form a batter.
For The Cook
- wring the extra moisture from the broccoli after you blanch it
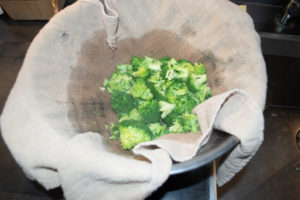
- Mix in the broccoli and any other optional ingredients at this time.
- Pour the batter into the pre-heated and greased 9-inch skillet.
- Bake in oven for 15-20 minutes, or until it is lightly browned around the edges,
- Cut into 8 pie shaped pieces and serve with a cold beer or other interesting beverages or sides.
Optional Ingredients:
- Scallions, jalapenos, bacon, corn and/or cheese to taste
Notes
Serve hot. Notes: Only fill the skillet halfway with the batter. It seems to be very important to use self-rising cornmeal and flour for this recipe and Beverly swears by White Lily self-rising flour and Martha White “Hot Rise” cornmeal. – jug Note: If you use fresh broccoli you should blanch it quickly before chopping. Then wring it out in a dish towel like you would the frozen stuff.
Things to serve with Cornbread
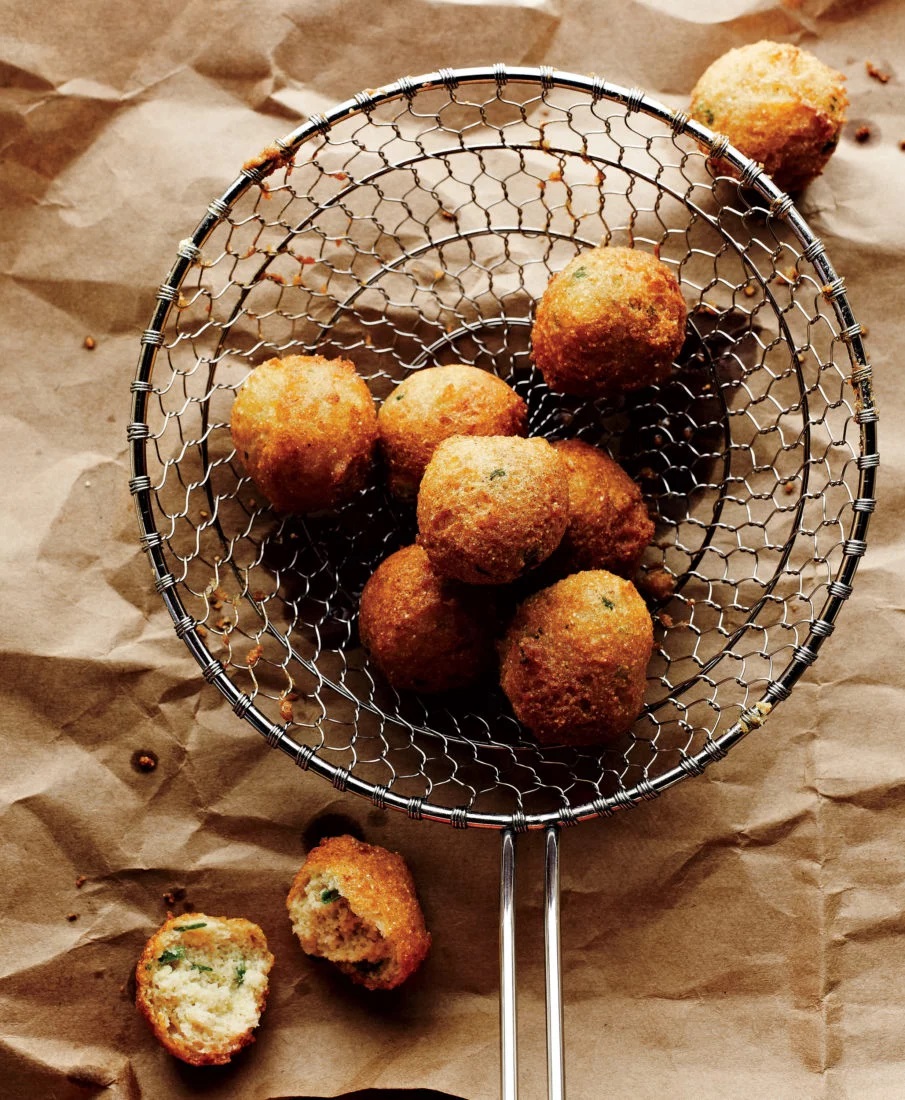
Leave it to a Georgia boy to make hush puppies hot in big-city Chicago. Though chef Cary Taylor may be a long way from home, he keeps his roots front and center at the Southern, in the Midwestern center’s Bucktown neighborhood. “I was born in Columbus on the Georgia-Alabama border, and living on the Chattahoochee River had a lot to do with how I grew up,” he says. “Hush puppies were my favorite. I ate them every chance I got, mostly at fish shacks and catfish fries.”
Passed down through generations of Southern cooks, hush puppies are traditionally served with seafood. “The earliest forms were just dropped dough, using the same cornmeal from dredging the fish,” Taylor says. “Folklore is that hush puppies even got their name because fishermen would toss them to the barking dogs so they’d hush up and not scare away the fish.”
To support local produce in his new home, Taylor uses a white cornmeal ground from sweet Illinois corn by Three Sisters Garden, though yellow works just as well, as long as it is fine grind. “Don’t beat the batter too much or it will get rubbery,” he says. “You want to keep the hush puppies fluffy.” Unless allergies prevent it, Taylor also recommends using peanut oil. “It’s the best frying oil to hold the heat and deliver the most color. And it’s the most Southern.”
To cook properly, hush puppies should be submerged in oil (about a three-inch depth ought to do it), so you need a pot with high sides. The chef suggests working in batches of eight, using a small cookie scoop or rounded tablespoons to get the perfect size. He serves the hush puppies steaming hot with a good tartar or rémoulade sauce, or with a Carolina smoked trout dip—reminiscent of the original hush puppy pairing. “It’s not the same as the catfish fries back home, but I am as authentic as I can be,” he says. “And hush puppies are comfort food—no matter where you’re from.”
Perfect hush puppies the Georgia way
Ingredients
DRY MIX
- 2 1/2 cups (397.5 g) fine-ground cornmeal white or yellow
- 1/2 cup (62.5 g) all-purpose flour
- 1 tbsp. (1 tbsp.) baking powder
- 1/2 tbsp. (0.5 tbsp.) sugar
- 1/2 tbsp. (0.5 tbsp.) ground black pepper
- 1/2 tbsp. (0.5 tbsp.) salt
- 3/4 tsp. (0.75 tsp.) baking soda
- 1/2 tsp. (0.5 tsp.) cayenne pepper
WET MIX
- 3 (3) eggs lightly beaten
- 1 1/2 cups (360 g) buttermilk
- 3/4 cup (75 g) scallions chopped
Instructions
PREPARATION
- Mix dry ingredients together in one bowl.
- In a separate bowl, mix wet ingredients together.
- Whisk wet and dry mixes together until the batter is just combined.
- Let rest for 10 minutes.
- In a 6-quart stockpot or a mini electric fry pot, heat oil to between 350ºF and 360ºF, keeping the oil at a steady temperature.
- Once the oil is hot enough, drop small scoops or rounded tablespoons of the batter into the oil in batches of eight.
- The cooking process is fast, about 60 to 90 seconds.
- As soon as the hush puppies start to float, use tongs to rotate (both sides should be crisp and light golden brown).
- It helps to put a pasta strainer on top of them at this point to keep them submerged.
- Use a slotted spoon to remove, and transfer to a clean brown bag to quickly drain.
- Season with salt
- Serve steaming hot
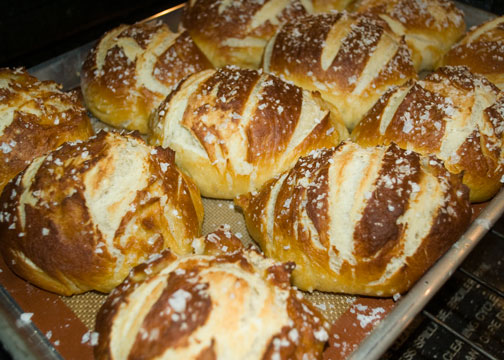
I am from German ancestry. My Grandmother and Grandfather both had their duties in the kitchen. Hot pretzels were a great treat to look forward to. This Pretzel Roll recipe has a few steps but isn’t very hard to do. The warm smell of fresh pretzels will make it all worthwhile. -jughandle
Pretzel Rolls
Ingredients
For the Dough
- 3-3/4 C Unbleached Wheat Flour
- 1-1/4 Oz Fast Acting Yeast 1 Pkg
- 2 Tb Sugar
- 2 t Salt
- 1-1/4 C Warm Water About 110 deg F
- 3 Tb Butter Melted And Cooled
For Boiling Water
- 1/4 C Baking Soda
- 5-7 C Water for boiling
Instructions
In The Bowl Of Your Stand Mixer:
- Combine 3 c of flour, yeast, 2 T of sugar and 1 t of salt
In A Medium Bowl:
- Whisk together the 1-1/4 cups of warm water and butter which should result in a lukewarm mixture.
- Add the butter mixture to the flour mixture in the stand mixer and mix with the dough hook until well combined, around 2 min.
- The dough shouldn't stick to your hands or work top.
- Transfer the dough to your lightly floured work surface.
- Punch it down and knead by hand for around 2 or 3 mins until you have a smooth, elastic dough ball.
- Add the remaining flour if necessary to make a smooth ball that isn't sticky.
- Put the dough ball back in your mixing bowl and cover with a towel.
- Let the dough rise in a warm spot around 100 deg F, if possible, until it is double in size.
- That should take around an hour.
- When the dough has risen, punch it down again and remove it from the bowl to knead once more for about 30 seconds
Prepare for baking:
- Divide the dough into 10 equal portions, about 3 ounces each
- Dust your hands with flour then roll the dough balls for about 10 seconds until the top of each is round and firm and you can feel the tension increasing against your hand.
- It creates surface tension and prevents the buns from becoming flat
- Place the rolls on parchment paper.
- Cover with a clean kitchen towel and let rise in a warm place until puffy, about 20 minutes.
Cooking:
- Preheat your oven to 425 deg F and line 2 baking sheets with parchment paper.
Boiling:
- While the oven is preheating bring a large pot with 5-7 cups of water and the 1/4 cup of baking soda to a rolling boil
- The water and baking soda might foam so don't fill the pot too full.
- With a slotted ladle or spoon, gently slip 2 rolls at a time into the boiling water and cook for 30 seconds, turn them over, and cook for another 30 seconds.
- The buns don’t need to be completely covered with the solution, but do take care that they don’t stick to the bottom of the pot or each other.
- Transfer the buns to a wire rack and let them drip-dry while you repeat with the remaining rolls.
Baking:
- After the rolls have dried, transfer them to the parchment-lined baking sheets.
- Use the tip of a sharp knife or razor blade, to score a X on top of each roll and sprinkle with coarse sea salt.
- Bake the pretzel rolls, 1 sheet at a time, until golden brown, about 16 minutes.
- Dive into the rolls while they’re still warm.
Notes
The secret to these buns is giving them a quick bath in a boiling alkaline solution before putting them in the oven to give them their distinctive Pretzel flavor and color. Dive into the rolls while they’re still warm.
James Beard is a legend in the food world. The yearly “James Beard Awards” are the Oscars of the culinary business. I haven’t yet tried Mr. Beard’s white bread recipe but I though some of you might be interested. – jughandle
Basic White Bread
Recipe
James Beard’s Basic White Bread Makes 1 large loaf or 2 small loaves
Step 1
- In a small bowl mix the yeast and the 1/4 cup warm water; add the sugar, stir well, and set aside until proofed. It is proofed when fermentation is apparent: the mixture will swell and small bubbles appear on the surface. (If it doesn’t proof at all, it means the yeast is not fresh or it is dead.)
- Step 2
- In a small saucepan heat the milk with the salt and stir in the butter until it melts. Set aside to cool until it is no warmer than the yeast mixture.
- Step 3
- Put 2 cups of the flour in a large mixing bowl and stir in the milk mixture. Beat well with a wooden spatula, add the yeast mixture, and continue beating the dough until it is smooth, adding an additional cup of flour to make a firm dough.
- Step 4
- Turn the dough out onto a floured work surface and begin the kneading process, which evenly distributes the fermenting yeast cells through the dough.
- Step 5
- There are several kneading methods, but the basic one is to flour the dough and your hand lightly, then push the heel of your hand down into the dough and away from you. Fold the dough over, give it a quarter turn, and push down again. Repeat pushing, folding and turning until the motion becomes rhythmic.
- Step 6
- Knead for about 10 minutes, kneading in additional flour as necessary, until the dough is smooth and no longer sticky, and blisters form on the surface.
- Step 7
- To test whether the dough has been kneaded enough make an indention in it with your fingers; it should spring back. If blisters form on the surface of the dough and break, this is another sign that the kneading is sufficient.
- * Note: If you have a heavy-duty electric mixer with a dough-hook attachment, knead the dough with the hook and finish it off on the board.
- Step 8
- Butter a large bowl, transfer the dough to it, and turn the bowl until the dough is well coated with butter on all sides. Cover the dough with a dish towel and let it rise in a warm, draft-free place for 1 to 1-1/2 hours, until it is doubled in bulk. A good, warm, draft-free place is inside your room temperature oven.
- Step 9
- To test further if the dough has risen properly, make an indentation in it with two fingers: if the dough does not spring back, then it is ready.
- Step 10
- Butter a 9x5x3 inch loaf pan, or two pans that are about 8x4x2 inches. Punch the dough down with your fist to deflate it; transfer it to a floured board and knead it well for about 3 minutes. Pat it into a smooth round or oval shape and let it rest for 4 to 5 minutes.
- Step 11
- Then form into 1 large or two small loaves, by shaping the dough into an oval the length of your bread pan, then gently stretching, rounding, and plumping it in the palms of your hands, tucking the edges underneath and pinching them together.
- Step 12
- Lift carefully; drop the dough into the pan or pans and smooth out. Cover the dough with a towel and let it rise again in a warm draft-free place for about 45 minutes to 1 hour, until it is double in bulk.
- Step 13
- Preheat the oven to 400 deg F. Brush the egg wash over the top of the dough.
- Step 14
- Bake in the center of the oven for 20 minutes; reduce the heat to 350 dF and bake for 20 to 25 minutes longer, until the crust is well browned and the bread sounds hollow when removed from the pan and tapped on the bottom with the knuckles.
- Step 15
- If you like a crusty loaf, remove it from the pan about 5 to 10 minutes before the end of the baking time and let it finish baking on the oven rack. It will get brown and crusty all over.
- Step 16
- Remove the bread from the oven and let it cool on a rack before slicing.
- The bread may be stored in a plastic bag in the refrigerator after it has cooled. If you seal it in a bag before it is completely cooled, the crust will become soft. Stored bread will keep about 1 week. It also freezes well if wrapped tightly in plastic wrap and sealed in a plastic bag and can be kept for up to 3 months.
Things You’ll Need
1pk Yeast; active, dry
1/4c Water; warm (110-115 degs)
2ts Sugar
1c Milk
3ts Salt
3tb Butter
3 3/4c Flour; All-purpose
————–EGG WASH——————
1md Egg White; beaten slightly
-in 1 tbspn warm water.
via Basic White Bread By James Beard Recipe | Garden Guides.
Basic White Bread – Recipe by James Beard
This recipe is James Beard’s classic white bread recipe. Once you master it you are good to go for bread. I did cut down the salt from 3 tsps to 1. – Jughandle
James Beard's Basic White Bread

Ingredients
INGREDIENTS
- 1 yeast package active dry
- 2 C water Warm to 100-115 degrees F
- 2 tsp sugar granulated
- 4 C all purpose flour approx. 1 lb
- 1 Tbsp salt
- 2 Tbsp butter Softened for buttering bowl and pan
Instructions
- In a small bowl mix the yeast and the 1/4 cup warm water; add the sugar, stir well, and set aside until proofed.
- It is proofed when fermentation is apparent: the mixture will swell and small bubbles appear on the surface. (If it doesn't proof at all, it means the yeast is not fresh or it is dead.)
- In a small saucepan heat the milk with the salt and stir in the butter until it melts. Set aside to cool until it is no warmer than the yeast mixture.
- Put 2 cups of the flour in a large mixing bowl and stir in the milk mixture. Beat well with a wooden spatula, add the yeast mixture, and continue beating the dough until it is smooth, adding an additional cup of flour to make a firm dough.
- Turn the dough out onto a floured work surface and begin the kneading process, which evenly distributes the fermenting yeast cells through the dough.
- There are several kneading methods, but the basic one is to flour the dough and your hand lightly, then push the heel of your hand down into the dough and away from you. Fold the dough over, give it a quarter turn, and push down again. Repeat pushing, folding and turning until the motion becomes rhythmic.
- Knead for about 10 minutes, kneading in additional flour as necessary, until the dough is smooth and no longer sticky, and blisters form on the surface.
- To test whether the dough has been kneaded enough make an indention in it with your fingers; it should spring back. If blisters form on the surface of the dough and break, this is another sign that the kneading is sufficient.
- * Note: If you have a heavy-duty electric mixer with a dough-hook attachment, knead the dough with the hook and finish it off on the board.
- Butter a large bowl, transfer the dough to it, and turn the bowl until the dough is well coated with butter on all sides. Cover the dough with a dish towel and let it rise in a warm, draft-free place for 1 to 1-1/2 hours, until it is doubled in bulk. A good, warm, draft-free place is inside your room temperature oven.
- To test further if the dough has risen properly, make an indentation in it with two fingers: if the dough does not spring back, then it is ready.
- Butter a 9x5x3 inch loaf pan, or two pans that are about 8x4x2 inches. Punch the dough down with your fist to deflate it; transfer it to a floured board and knead it well for about 3 minutes. Pat it into a smooth round or oval shape and let it rest for 4 to 5 minutes.
- Then form into 1 large or two small loaves, by shaping the dough into an oval the length of your bread pan, then gently stretching, rounding, and plumping it in the palms of your hands, tucking the edges underneath and pinching them together.
- Lift carefully; drop the dough into the pan or pans and smooth out. Cover the dough with a towel and let it rise again in a warm draft-free place for about 45 minutes to 1 hour, until it is double in bulk.
- Preheat the oven to 400 d F. Brush the egg wash over the top of the dough.
- Bake in the center of the oven for 20 minutes; reduce the heat to 350 d F and bake for 20 to 25 minutes longer, until the crust is well browned and the bread sounds hollow when removed from the pan and tapped on the bottom with the knuckles.
- If you like a crusty loaf, remove it from the pan about 5 to 10 minutes before the end of the baking time and let it finish baking on the oven rack. It will get brown and crusty all over.
Notes
Notes to self:
Self- for successful cooking at Thanksgiving in the future try to have fewer than 55 items on the menu for the week, 40 of which were new recipes I’ve never tried before.
Self- Don’t renovate the kitchen two days before a major holiday when 6 guests are coming to Thanksgiving dinner.
Attempted and the Result
My eyes are always bigger than my stomach and I seem to always be thinking about what I can accomplish with energy and dexterity I had 15 years ago. The following are the dishes I scheduled to cook for the holiday week. Some were good, some bad, and some were memorable. Click on the links for the recipes:
 Spinach Balls – These looked great and weren’t too hard to make. I substituted Panko bread crumbs for the All Brand Buds – the buds looked too much like kibble. I sauteed fresh spinach instead of using frozen and I also made my own croutons instead of using stuffing mix.
I screwed up by cooking them too long and some were burned and some were ok.
The mustard dip was great if you make your own ranch dressing. I’d do these again and not cook them to death. They did hold together well.
I made the balls with a small scoop and they were easy.
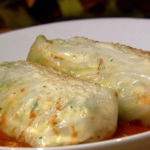 Mario Batali’s Stuffed Cabbage – This is a killer, must do and remember type of recipe. The instructions include a “how to” on how to make the leaves soft enough to fold easily and was perfect and easy.
The recipe is vegetarian, but you could leave out the cheese and make it vegan pretty easily, or add meat and have a great dish too. I substituted grated white cheddar cheese for the ricotta and Pecorino and it was very nice. Don’t use tooth picks to hold the packets together, I didn’t. Just roll them up and turn them seam down on the cooking sheet.
Drizzle a little olive oil on the outside before baking and sprinkle with Panko bread crumbs for a little crunch. I’m using some sesame seeds next time.
Every one will love this dish with freshly made tomato sauce.
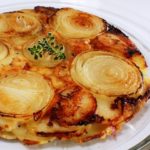 Upside Down Potato and Onion Tart – This is the best dish of the week. It was gone in 60 sec, just like the movie.
I made this one exactly like the recipe called for, cutting my onions and potatoes on a mandolin slicer, which made it faster but wasn’t necessary.
Use a 9 inch, deep-sided, cast-iron skillet and everything will fit nicely. This can be cooked a little in advance. I did and when it came time to flip it onto a serving plate I had to warm the bottom and run a knife around the side of the skillet to release it from the pan, but it came out perfectly.
The tart will cut neatly using a pizza wheel. Everyone will wonder why you didn’t make two.
I only recommend that you make sure you have another pan under the skillet when you put it into the oven to catch spill over and avoid filling the kitchen with smoke.
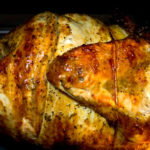 Turkey number 1 – the rotisserie turkey is always a winner. We have a Ronco standard rotisserie oven that gets used 3, sometimes 4 or 5 times a week. I use it for everything from meat to vegetables. The turkey gets brined with a 1/2 cup of sugar and 1/2 cup of salt to every 2 gals of water, over night. You don’t really have to do the brine with the rotisserie as it distributes the juices and always leaves a juicy result. I dry the bird and rub it with olive oil, then sprinkle liberally with McCormick’s lemon-pepper. That’s it. This bird was a 13 pounder so I cooked it for 3 hours and 15 mins, then rotated without heat to redistribute the juices for 20 mins. Easy. It pulls apart.
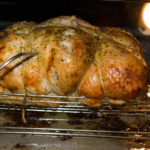 Turkey number 2, the de-boned stuffed turkey – My first de-boning of a turkey, went as well as could be expected. No skin tears or bone fragments. I cheated a little and left the wing and leg bones intact to better represent a whole turkey. The stuffing was my own mix of rice, whole hard cooked eggs, spinach, arugula, mushrooms, dried fruit and nuts. The eggs were mostly for presentation when the bird was sliced, but I should have added 2 or 3 raw eggs to the mix to bind the stuffing more. When it was cut the stuffing kind of fell out. The second picture shows the sliced bird. I was able to eat the stuffing which was great. Nice and moist. Everyone loved the turkey and it would have been a star if it hadn’t been for the rotisserie turkey.
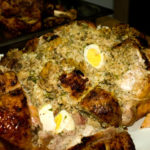 This is the sliced bird with the egg reveal.
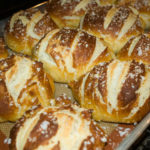 The winner is!! Pretzel rolls – this recipe got the most raves of all. We had these with a nice potato soup that I made last week and Darlene doctored. Chopped turkey was optional to add to the soup. These rolls were easy to make. They only have to rise about an hour and they you poach them in a salt/soda bath to make a pretzel like crust before baking them for 20 mins. Crust on outside, doughy on the inside. Great with butter or dipped in the soup. I’ll be making these once a month at least.
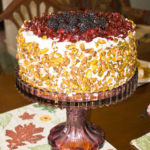 Thought I’d show you one of the desserts. This is a double layer cheese cake with pistachio nuts on the outside and dried cherries and fresh blackberries on top. Mine isn’t as pretty as the recipe, which was only one layer, but it was good. I didn’t chop the nuts, so mine didn’t cover as well as the recipe’s and I changed the berries too. My mother and I jointly made this cake using an old standard Philadelphia cheese cake recipe that is a never fail recipe. It is so rich that only a small piece with satisfy even the sweetest of tooths.
More successes and failures on my next post – jughandle
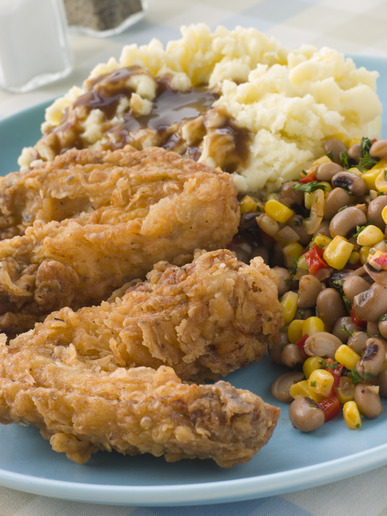
Fried Chicken and Cornbread, doesn’t that sound good? Since I’ve now been a flexa-vegan-tarian for 5 weeks now and counting, the fried chicken is making my mouth water like all get out. I thought I’d treat the crowd who isn’t beating themselves with a stick (read going on a diet) with a couple of great recipes from my mother-in-law and sister-in-law. These are consistently the best pan fried chicken and corn bread I’ve ever eaten. The down side to these recipes is that like all great cooks, Beverly and Ella Ween don’t use a recipe, but cook by “feel” instead. I’ll do my best to provide you with repeatable recipes.
Cornbread
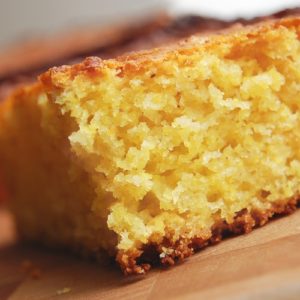
Beverly’s corn bread is crisp on the outside and soft and juicy on the inside. It smells great and is good with just about anything or nothing at all but a little butter. She insists on using self-rising Martha White brand flour and self-rising White Lily brand corn meal and who can argue with perfection. She coats the 9″ cast iron skillet with a heavy helping of Crisco shortening, but I bet lard would be good too. The batter is a mixture of white flour and Corn meal but is heavily weighted to the corn meal side using 3 cups. The wet ingredients are 2 eggs and a cup of buttermilk. She cooks it hot at 425-450 and it comes out with a crispy crust because of the Crisco in the skillet.
Click here for the full recipe
Pan Fried Chicken
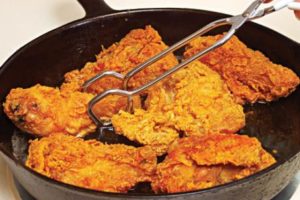
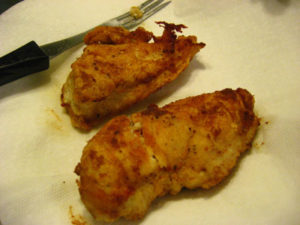
Considering my new status as a non-meat eater, it is going to be hard to get through this post. My mouth is already watering from the memories of crispy, tender, succulent fried chicken… …Ok, I’m back now. This chicken that my mother-in-law, Ella Ween makes is hard to describe, except to say I could easily eat a whole bird, piece by delectable, scrumptious, luscious piece. Ella Ween achieves a great piece of chicken by removing the skin. Then generously seasons the pieces with salt and pepper before dredging in a wet mix of egg and buttermilk. The dredge is followed by a dry coating of seasoned self-rising flour. “I’ve seen that or done that before”, you might be thinking. Yeah, you might have, but did you use self-rising flour? Or follow that by browning the chicken on both sides in the hot oil? Then did you lower the temperature and cover the pan while simultaneously frying and steaming the bird? I didn’t think so. People, this is seriously good chicken.
click here for the complete recipe

